Tips Index
Windows 8 operating system has changed a lot compared with previous Windows 7 and XP, resulting in many new users that lack the knowledge of basic functions such as screen capture function.
There are times when you see some awesome pictures or videos you want to take screenshots of or even wanna capture the whole screen, but the problem is that you don’t know how to take screenshots on Windows 8 system.
Nowadays, there are many screenshot tools on the Internet. As long as you search online, you will find many third-party screenshot software.
Results are flooding about being the best screenshot tool and many users are kind of confused in choosing which screenshot software is the best. Well, lucky for you, you’ll know that VideoPower GREEN is not only the best but the easiest and most functional screencast software of all time. Now there is no need to bother and look anywhere else.
Download the software through this link and follow the instructions.
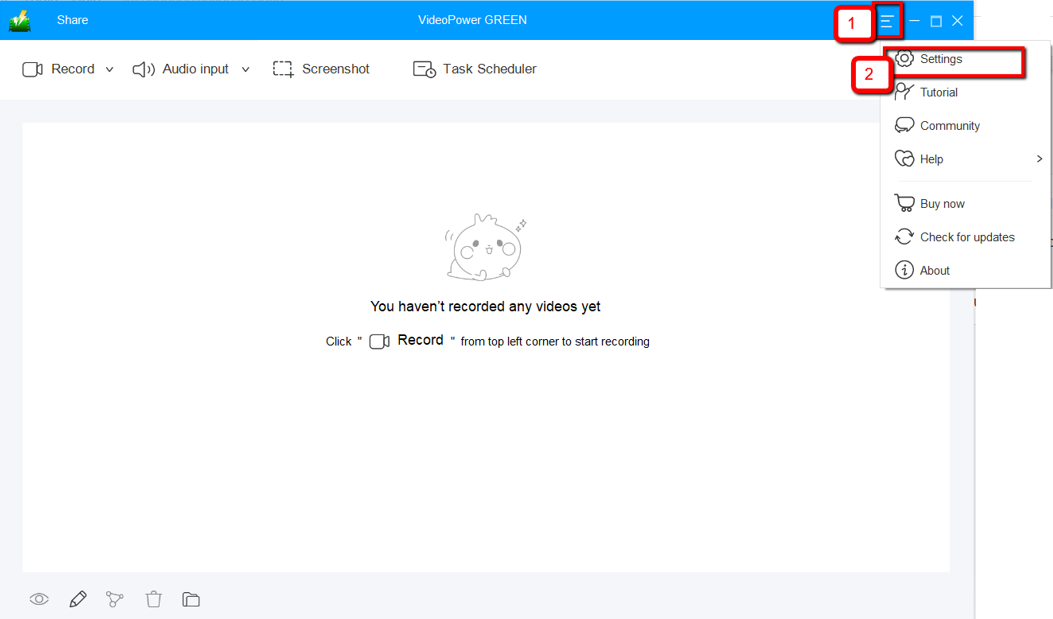
Step 1: Manage settings.
1) Click the menu on the upper right corner of the interface.
2) Choose “Settings” from the drop-down menu.
3) Navigate to the “Take Screenshot” section. Make changes accordingly then click “OK.”

Step 2: Take a screenshot on Windows 8.
1) Click on the “Screenshot” tab.

2) Select the region on the screen that you want to take a screenshot of. By moving the mouse around the screen, you’ll be able to see what types of screenshots you can do.

3) After clicking, you will get a snapshot of the selected region. You can make changes to it accordingly by exploring the menu (highlighted in red) before saving the screenshot.

Conclusion:
Using Windows 8 and wanting to screenshot any specific parts of the screen is a bit complicated. With VideoPower GREEN, screenshot on Windows 8 is easy and possible in just a few clicks and various choices on how to do it.
VideoPower GREEN is a multi-faceted software that has a lot of functions like audio recording and task scheduler.