Tips Index
Taking a screenshot is known to be one of the simplest ways of capturing photos in a digital device screen. It is also done using laptops and computers. But each device must have the exact and perfect tool in it that every user can trust. This must be the thing a Lenovo user is looking for.
Lenovo is a well-known Chinese digital brand. It is the third-largest PC manufacturer in the world right behind Apple and Acer. It ranks among the Fortune Global 500 and is growing the fastest among the top five computer manufacturers.
Like other device users, Lenovo’s users also encounter one of the most common questions, which is, “How to make screenshots on Lenovo?”
As a response, here is VideoPower GREEN, a screen capturing tool that is very easy to use with different trusted features. It offers various capturing modes such as full screen, windows, fixed, scrolling screen and hand-drawn area.
Stop thinking twice. Take a look at it and download the software with the link below.
Step 1: Manage settings before taking a screenshot on your Lenovo PC
1) Click the menu on the upper right corner of the interface.
2) Choose “Settings” from the drop-down menu.
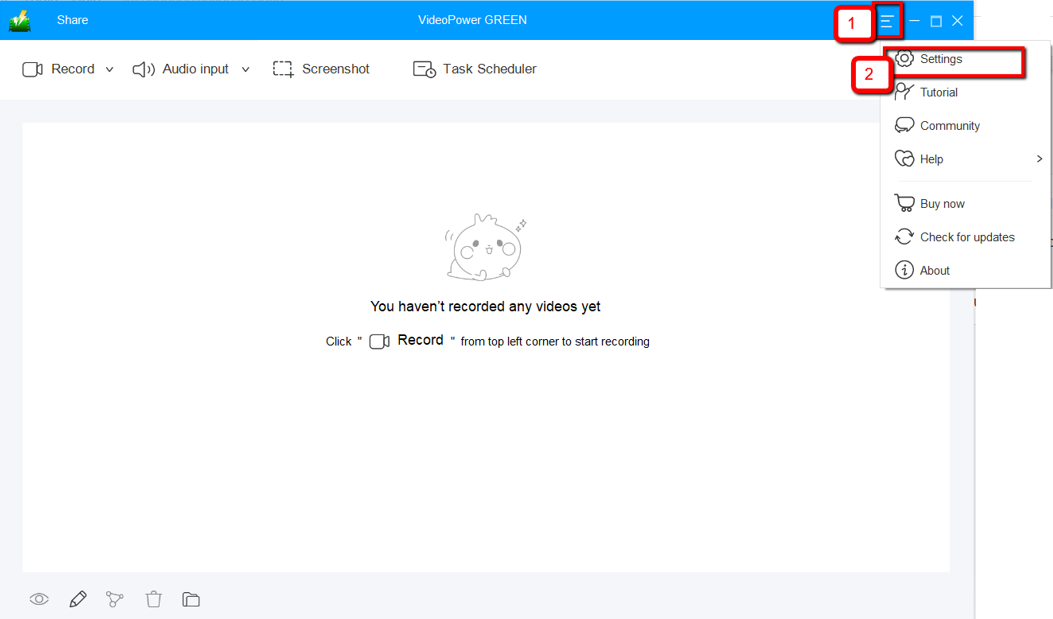
3) Navigate to the “Take Screenshot” section. Make changes accordingly then click “OK.”

Step 2: Take a screenshot on Lenovo
Click on the “Screenshot” tab.

1) Select the region on the screen that you want to take a screenshot of. By moving the mouse around the screen, you’ll be able to see what types of screenshots you can do.

2) After clicking, you will get a snapshot of the selected region. You can make changes to it accordingly by exploring the menu (highlighted in red) before saving the screenshot.

Conclusion:
VideoPower GREEN lets you take screenshots on your Lenovo computers easily in high quality. Choose specific areas to capture like full screen, a specific window or area. It can record your screen activity and the audio in the microphone and the system sounds. If you only want to record audio then that’s fine too, web camera footage can also be recorded.
The task scheduler tool is greatly helpful if you want to record live streaming videos, webinars, web cameras, etc. and you are not present in front of your PC. So you set a specific time and date or the duration of the recording so when the time comes for the schedule to do its job, it will automatically record what’s going on in your screen.