Tips Index
Webex network conference system is a network-based multimedia conference platform. It supports multi-person video meetings, video communication, multi-person audio, screen sharing, dynamic PPT presentation, text communication, electronic whiteboard, desktop sharing, file transmission, voting and so on.
Webex enables users to achieve face-to-face communication through the Internet without the time and zone restrictions.
This product also provides a meeting recording functions too, but many users complained that they can’t find a way to export the recorded Webex meeting video through it.
For most of the users, they find it essential to record and of course convert the Webex meeting especially those that involve negotiations or future plans of the company.
So, is there any other way to record and convert video in Webex in just one go?
Introducing the best and easiest screen recording application software called VideoPower GREEN. Now, no need to be bothered anymore.
Step 1: Customize video settings before recording Web-ex meeting
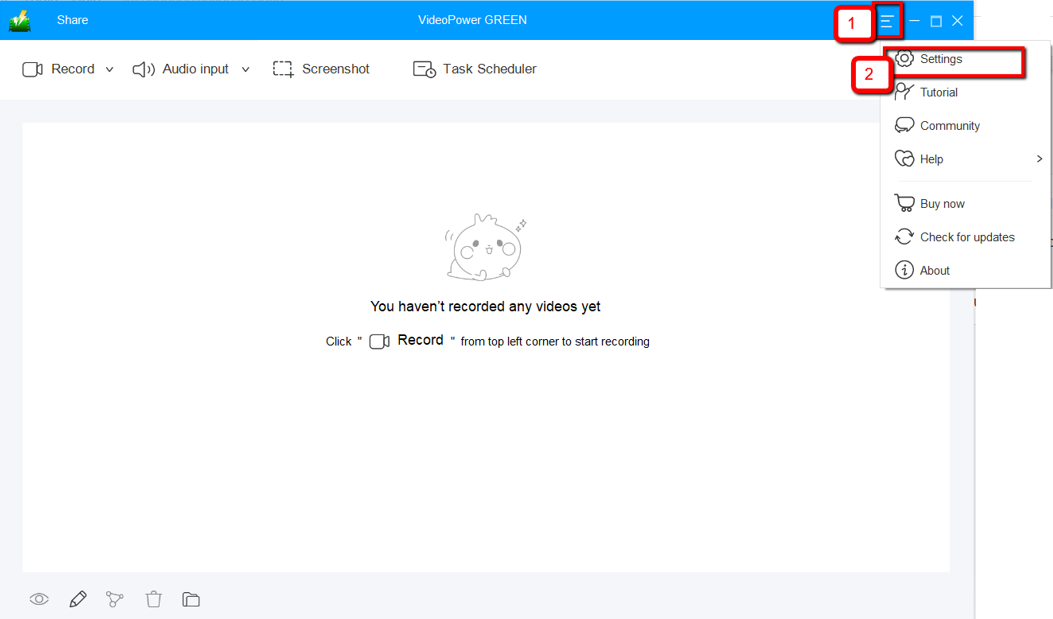
1.1 Open Settings
1) Click the menu on the upper right corner of the interface.
2) Choose “Settings” from the drop-down menu.
1.2 Change video settings
1) Click the “Video” tab on the left side of the interface.
2) You are now able to customize the Output format, Codec, Bitrate, and Frame rate of the recording video as per need.
3) Click “OK” to save settings。

Step 2: Record Web-ex meeting
2.1 Choose a sound source
You can choose “System sound, Microphone, System sound and microphone or None.” To record video meeting, you can select “System sound and microphone”.

2.2 Select a recording area
Click on the “Record” button to choose the recording mode from “Full screen, Region, Audio, Web camera, Around mouse”. Select the area you are going to record.

2.3 Start to record
The pop-up window will ask whether you are ready to start recording, click “OK” to confirm when you are ready to record.

2.4 Edit video while recording
While recording you can add lines, arrows, shapes, texts, highlight, blur, etc. by clicking the edit button.

2.5 End the recording
Click the “Stop” button to stop recording.

Step 3: Manage your recorded video
After that, the recorded file is already saved in the pointed output folder.
1) Your recorded file can be seen in the main interface. You can right-click the file and do more operations if you like.
2) Click the folder icon to view it in the pointed output folder.

Conclusion:
Recording screen activity and audio with this software are really great. VideoPower GREEN has surpassed expectations.
Record screen and audio from the microphone during your Web-ex meeting while adding arrows, highlights, and comments to videos. Isn’t that awesome?
After recording if you want to edit some parts, look no more because VPG got it all for you. It has a video editor extension wherein you can trim unnecessary parts or add necessary parts together. You can adjust dark videos brightly and easily, and adjust the color, zoom in on a part of the video or create fast/slow-motion videos.