





Index
BLUE
3. Settings
To customize the settings after starting VideoPower BLUE and before starting video editing/conversion, check out “Menu” icons to:
* Click the “Menu” icon to change settings such as “Settings” and “Language”.
* You can also check for updates and version information and also change the storage location for conversions and snapshots to a location that is easy for you to remember.

3.1 General settings
Use to set up whether or not to display a confirmation screen before quitting VideoPower BLUE.

3.2 Conversion settings
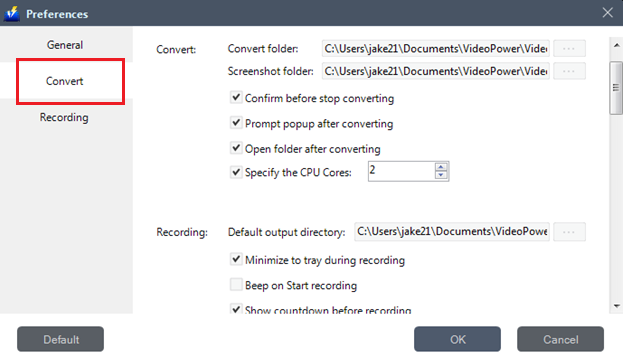
Use to set up the storage location for conversions and to change snapshot location that is easy to remember.
The number of CPU cores to be used when using a CPU.
With multiple cores, you can set the number of cores assigned to this product. The larger the number, the greater the performance.
3.3 Recording settings
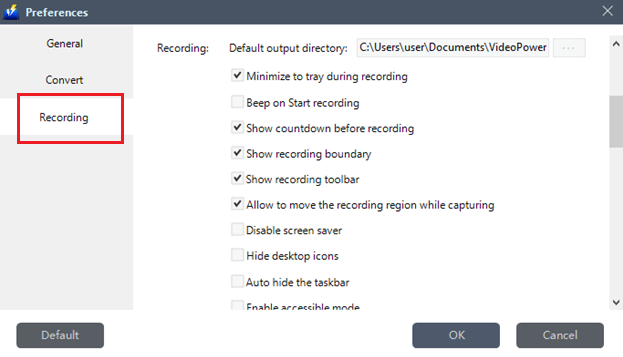
Used to set up such as the storage location for recordings and toolbar displays.
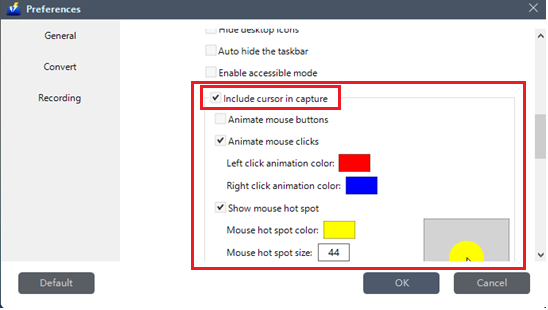
3.3.1 Mouse Cursor Recording Settings
3.3.2 Keyboard Shortcut Settings
Use to set up keyboard shortcuts for easy access while recording in full screen and when you need to hide the recording toolbar.

3.3.3 Recording Format
Use to set up recorded video with the following formats such as MP4, WMV, AVI, MOV, FLV, MPEG, VOB, ASF, and GIF to be saved afterward.
The sound source and sound quality of the recording can also be set here.

If you click “Default”, all the standard settings will remain as the default settings. Click “OK” to save all settings.